Click-4-Carbon
Empowering your customers to reduce their CO2 footprint
Before we begin
Modifying your shopify theme requires some exposure/experience with HTML if you are uncomfortable with or don't have any experience we can help! Just get in contact with us: helpdesk@ecommercify.ch
Which shopping cart do you have?
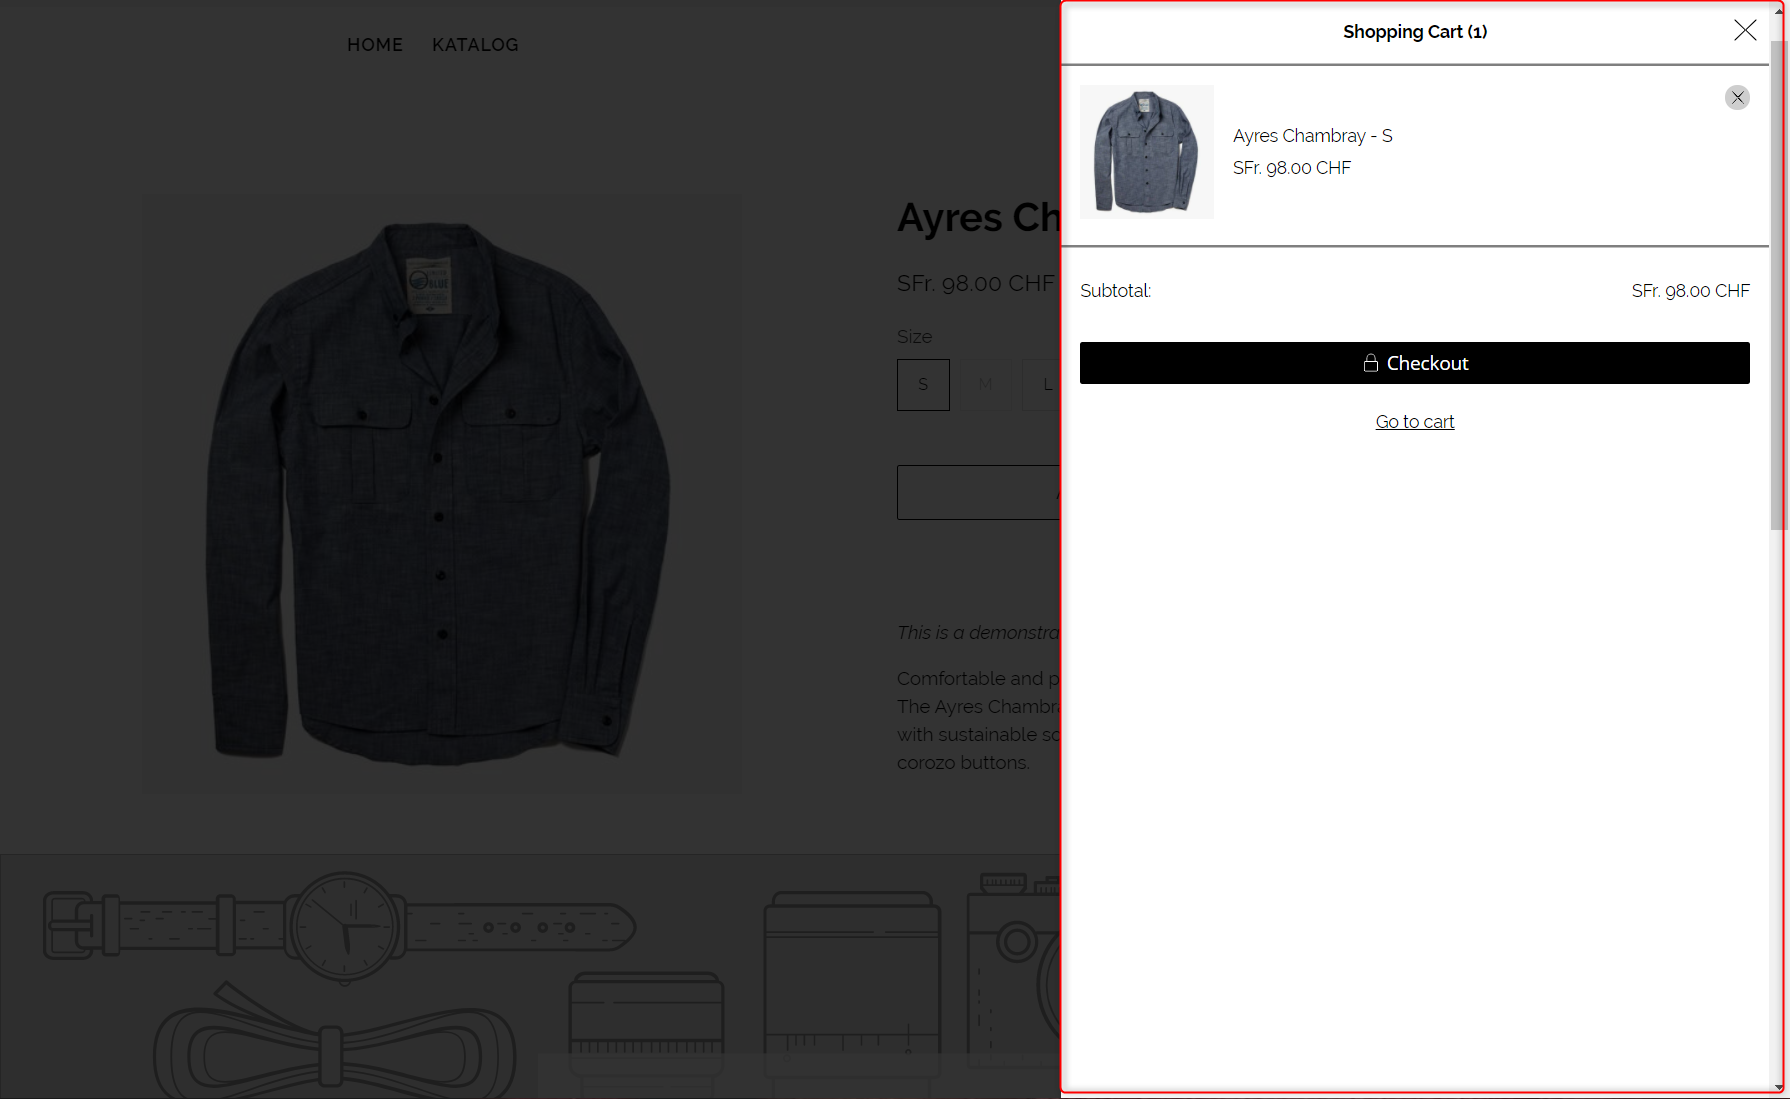
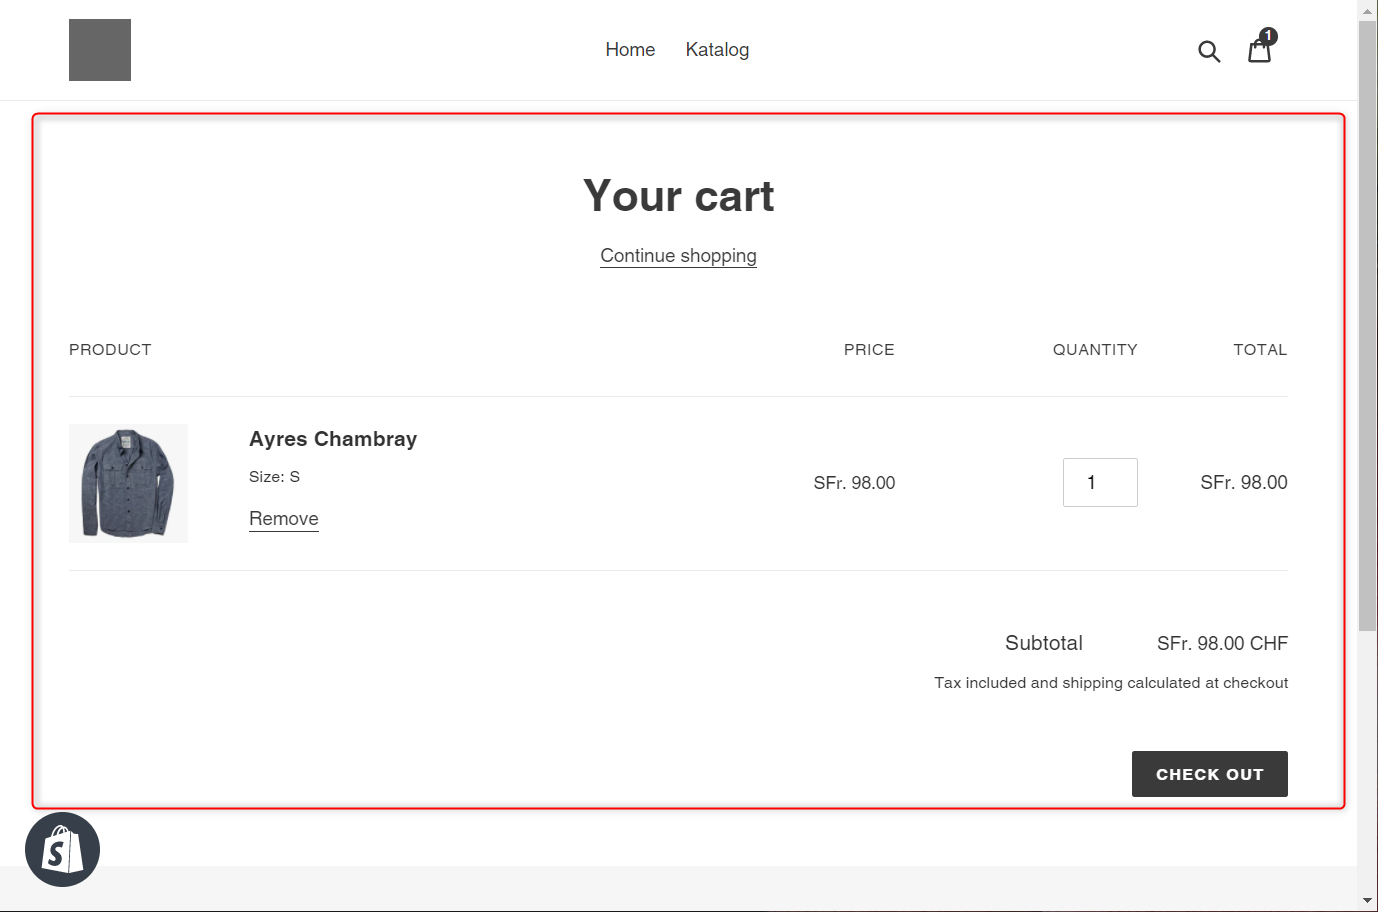
There are generally two types of shopping carts in Shopify, the drawer style (image on the left) or standalone styled (image on the right) carts. Pick the style below to go to the instructions for your particular cart. Please also note that each theme's HTML structure is generally unique to the theme.
For our instructions we used the shopify pre-installed Debut theme.
Drawer Cart Installation Instructions
Please Note: The following instructions are for the Flex theme
Step 1: Log into your store
If you aren't already logged into your store please do so now.
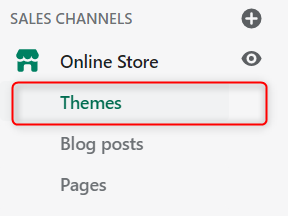
Once you are logged in we will access your theme files by first clicking on Themes in your shop admin and then Edit Code

Step 2: Find your cart
Before we add the widget to your theme files we first have to find the right place to do that.
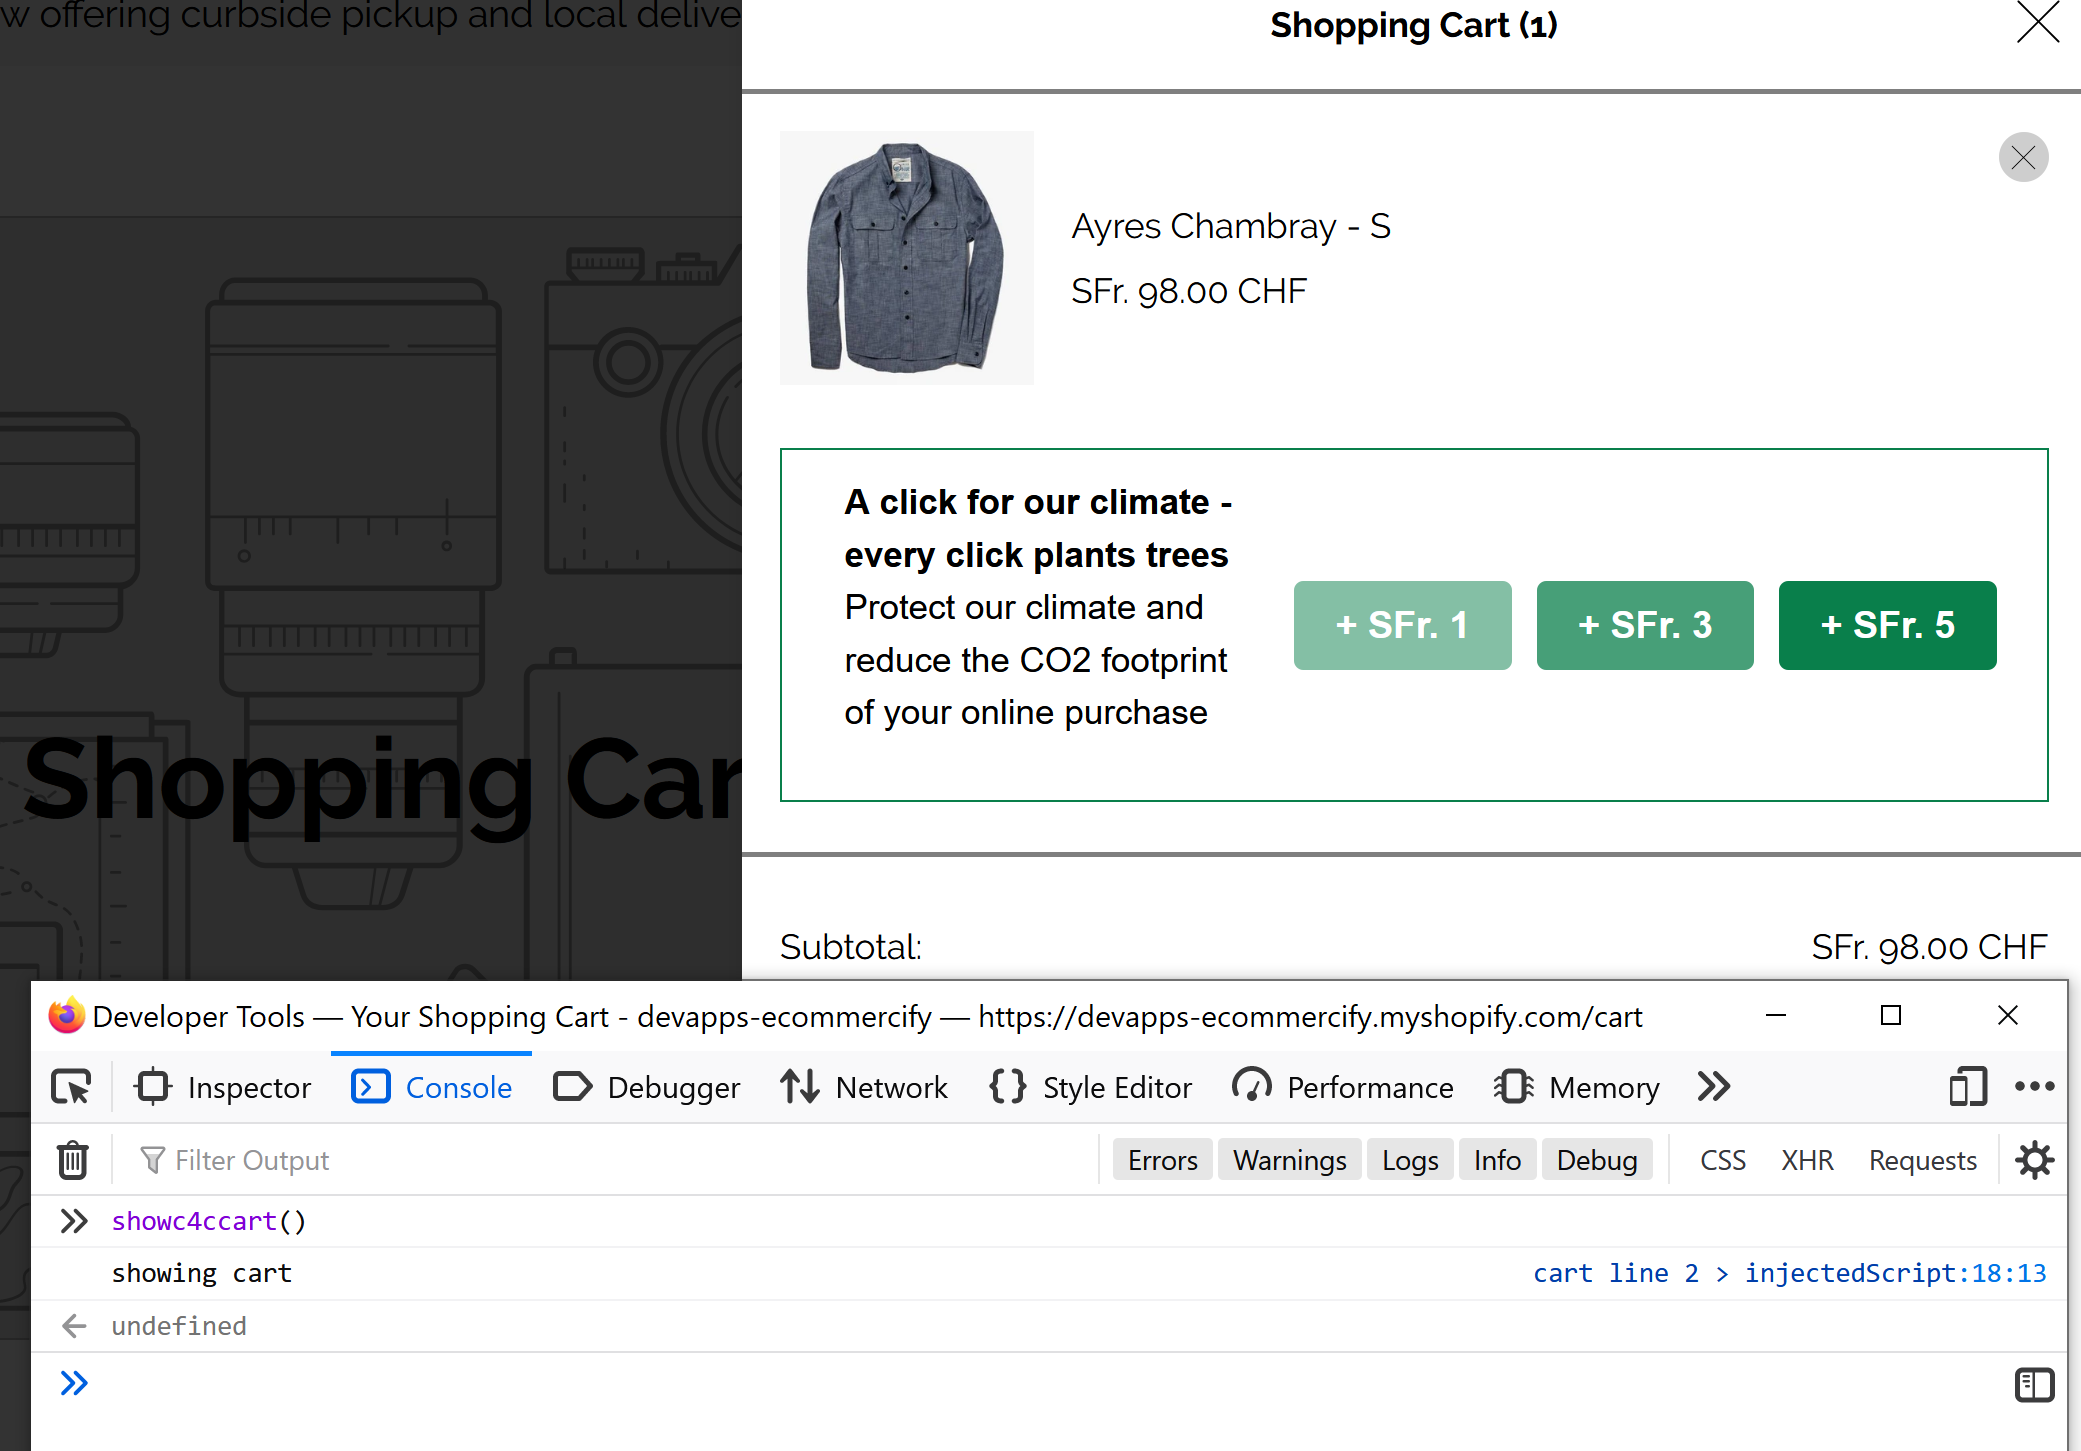
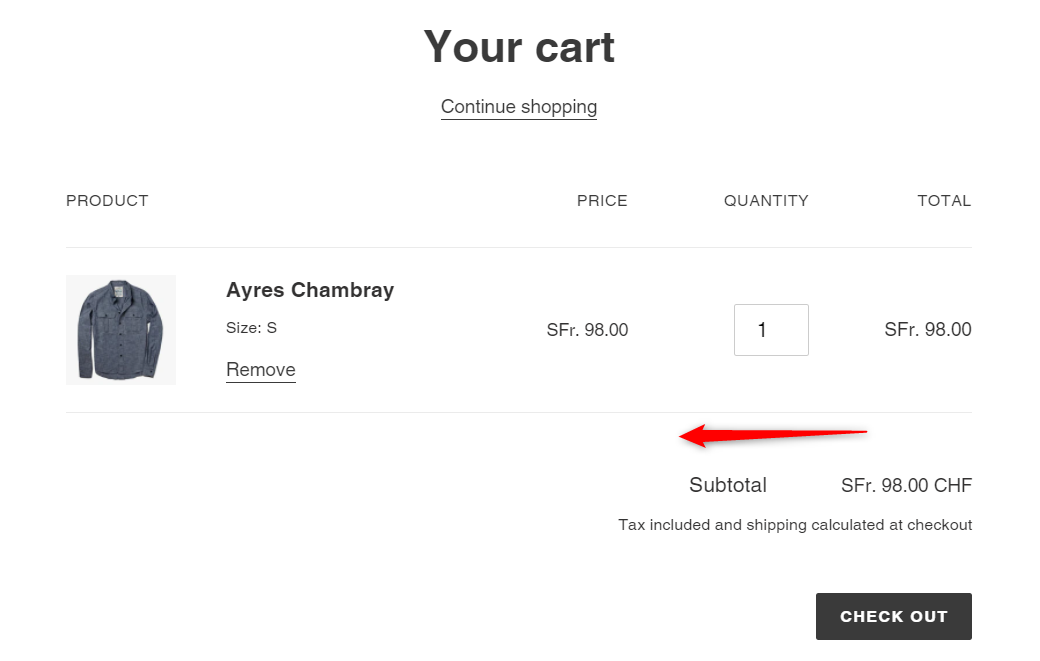
Open a new browser tab and go to your store. Add a couple of items to your cart and then view the cart.
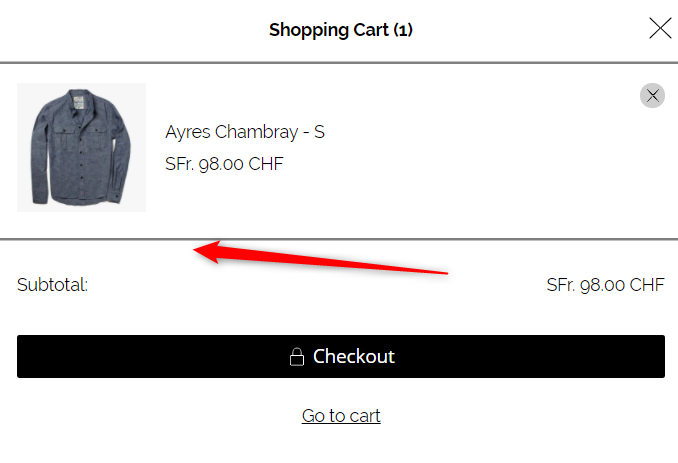
The best spot to add the widget is just after the list of items but before the summary information (the part that shows the cart subtotal)
Your cart will always be wrapped in <form> </form> tags and may optionally be wrapped with <table> </table> tags but this depends entirely on your theme. Lets now find the right element.
A great tool for that is the inspect feature in all modern browsers. Right-click near the end of the list of cart items and select inspect.
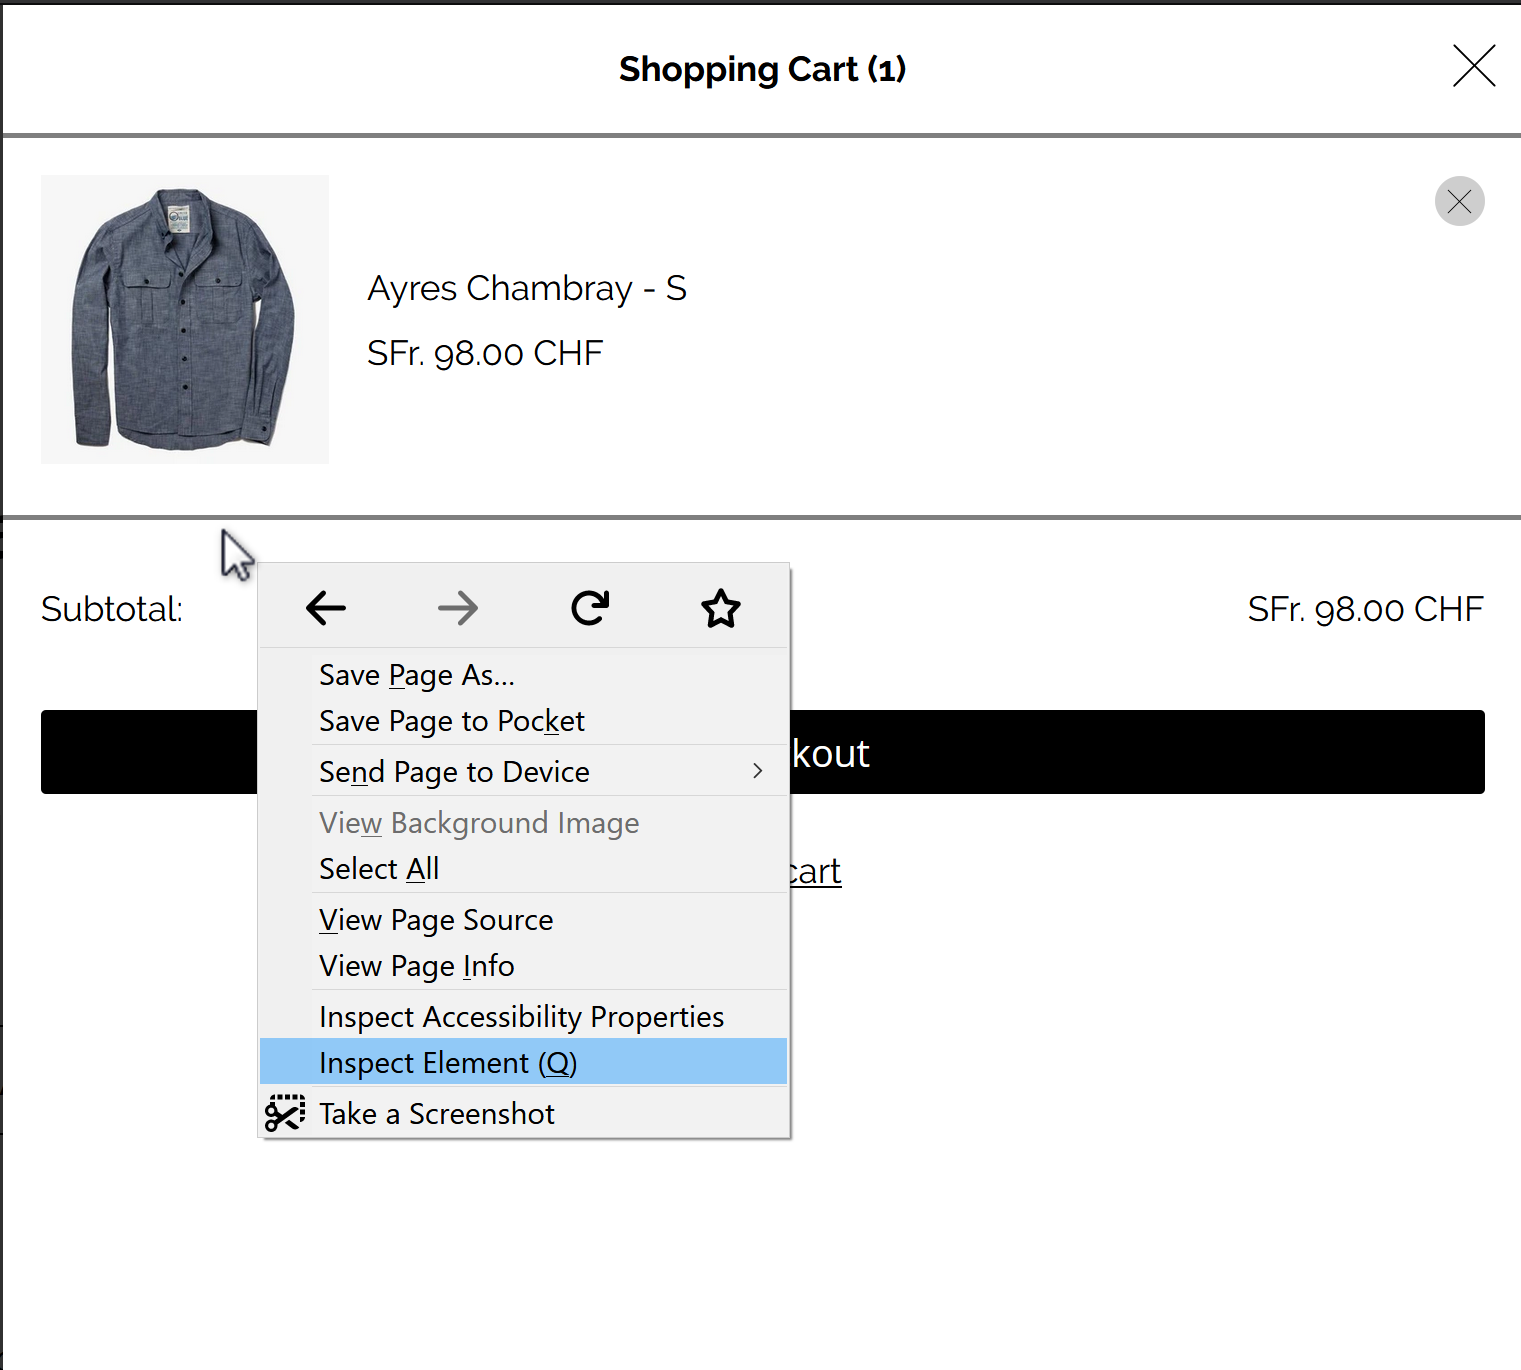
This will show the underlying HTML code, hover over the individual elements until the summary table is highlighted and you find the start element.
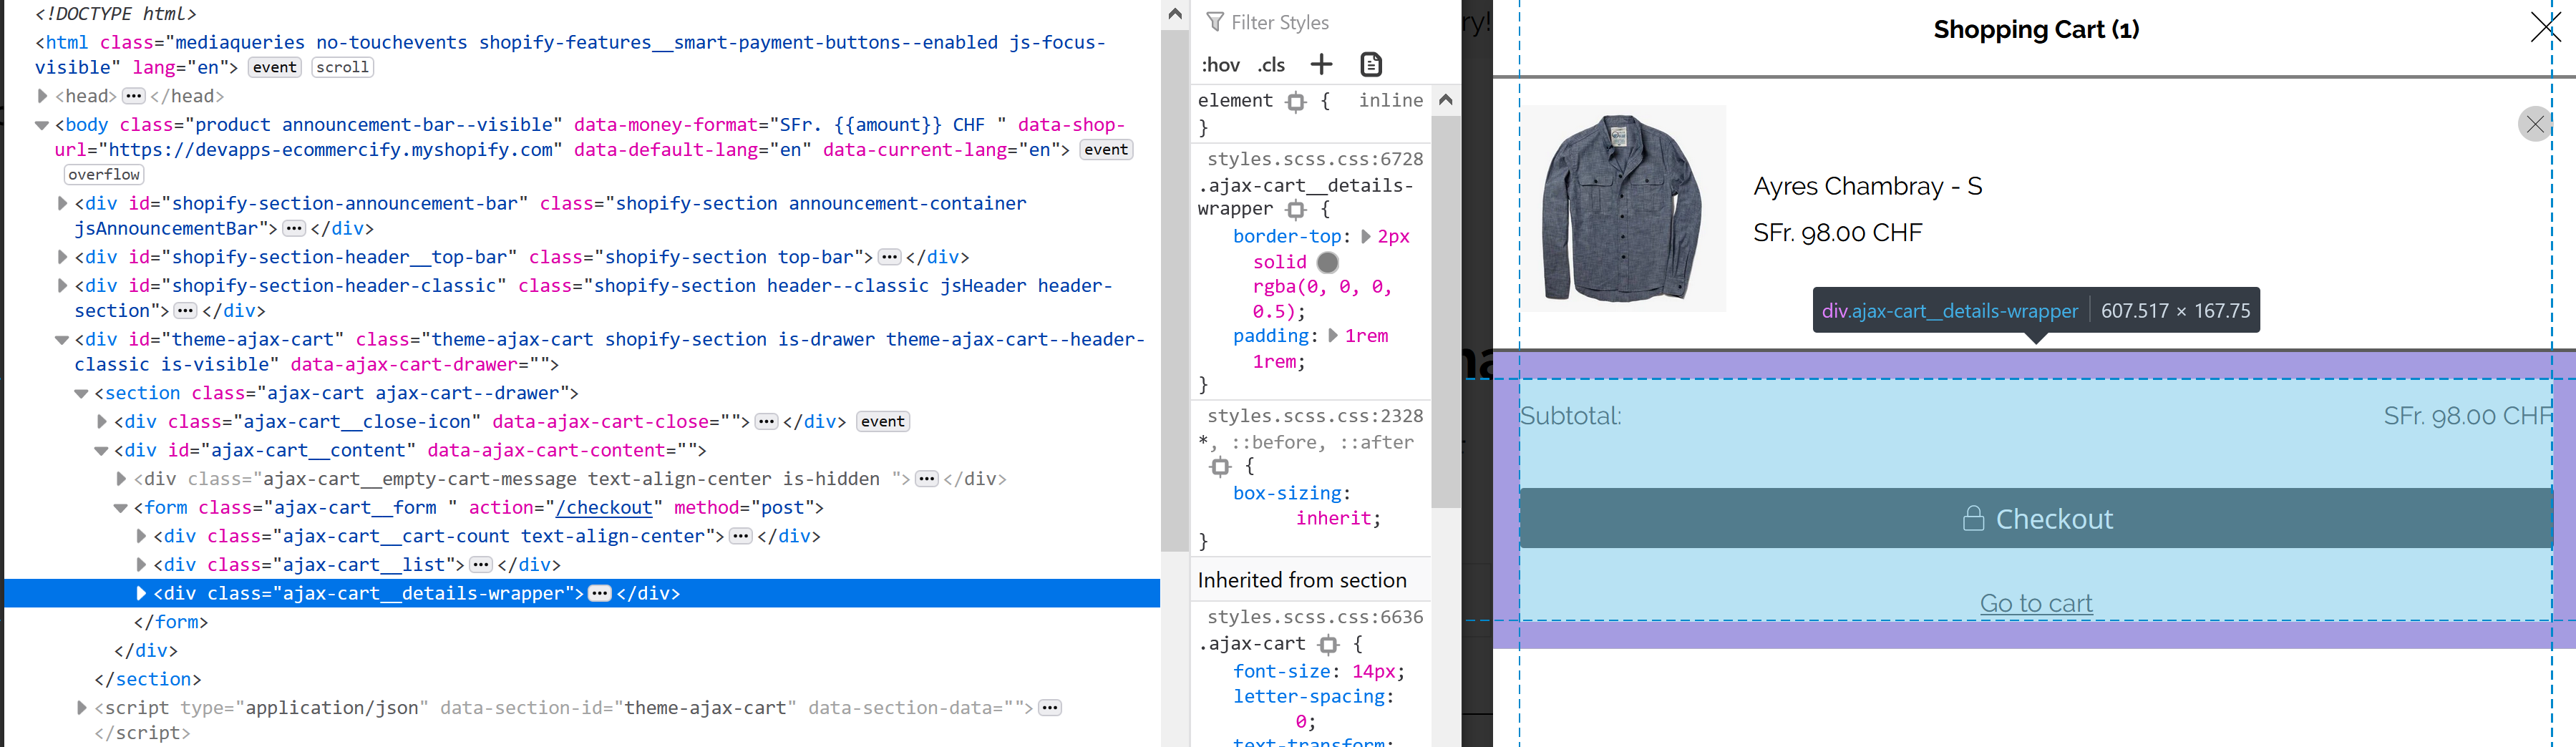
The <div class="ajax-cart__details-wrapper"> element is the one we are looking for.
Now lets find that spot in your themes liquid files.
Step 3: Install the Widget Snippet
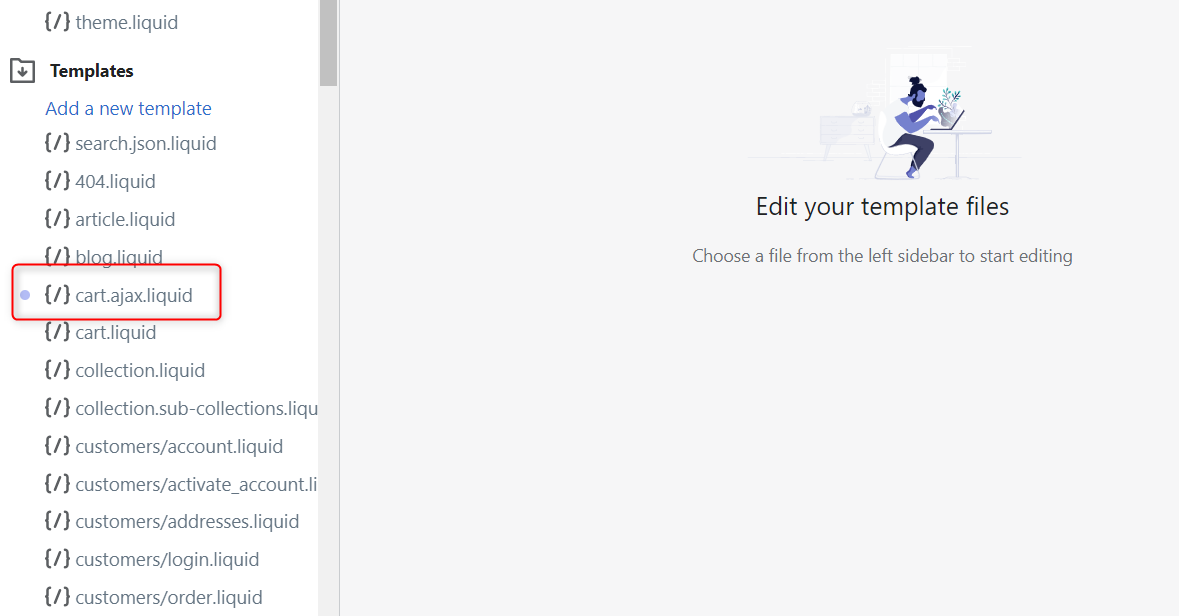
Back in the Shopify code editor locate your theme specific cart file.
Depending on your theme the HTML element you found in the step above might be in a number of different files. A couple common places are:
- templates/cart.ajax.liquid (Flex theme)
- templates/cart.liquid
- sections/cart-template.liquid
- snippets/cart-form.liquid
- snippets/cart-drawer.liquid
Since in this example we are using the Flex theme our drawer cart code is located in the templates/cart.ajax.liquid file.
Use the search feature in the code editor to search for the HTML element from step 2.
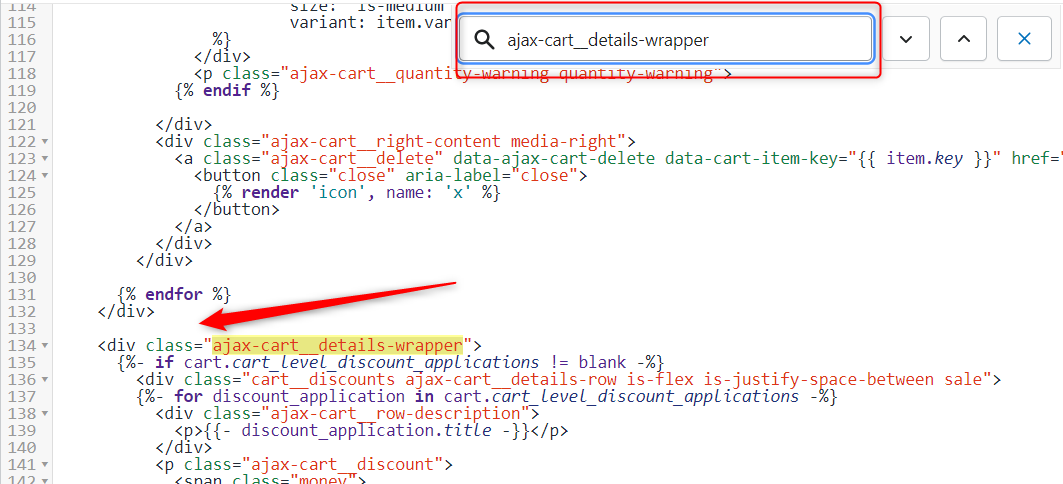
Now insert the code snippet {% render 'click_for_carbon' type:'drawer' %} just above the element:
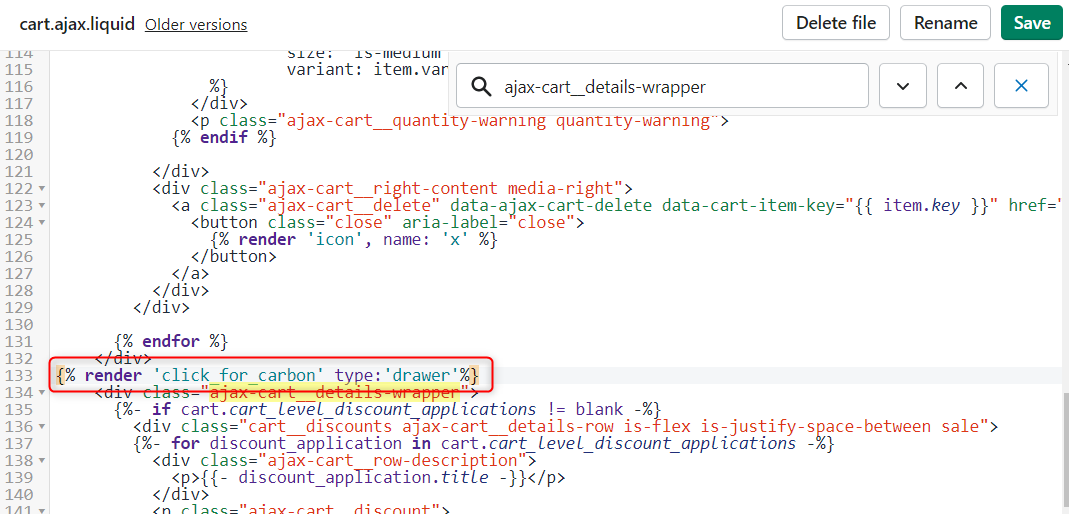
And thats it! Just save the file to finish the installation.
Step 4: Preview the Cart
To see the cart widget in action go back to the browser tab where you have your stores shopping cart open (from step 2 above) and add ?c4c-preview=true in the browser address bar and press the enter key.
Ensure that it's in the right place and lined up with the other elements in the cart. Don't worry, only you can see the widget at this point.
Please note that you may not see the widget in the drawer itself (it loads differently than the standard cart page)
if that is the case, with your drawer cart still open, open your browser developer tools (ctrl+shift+i in Chrome, FF, Edge) switch to the console tab
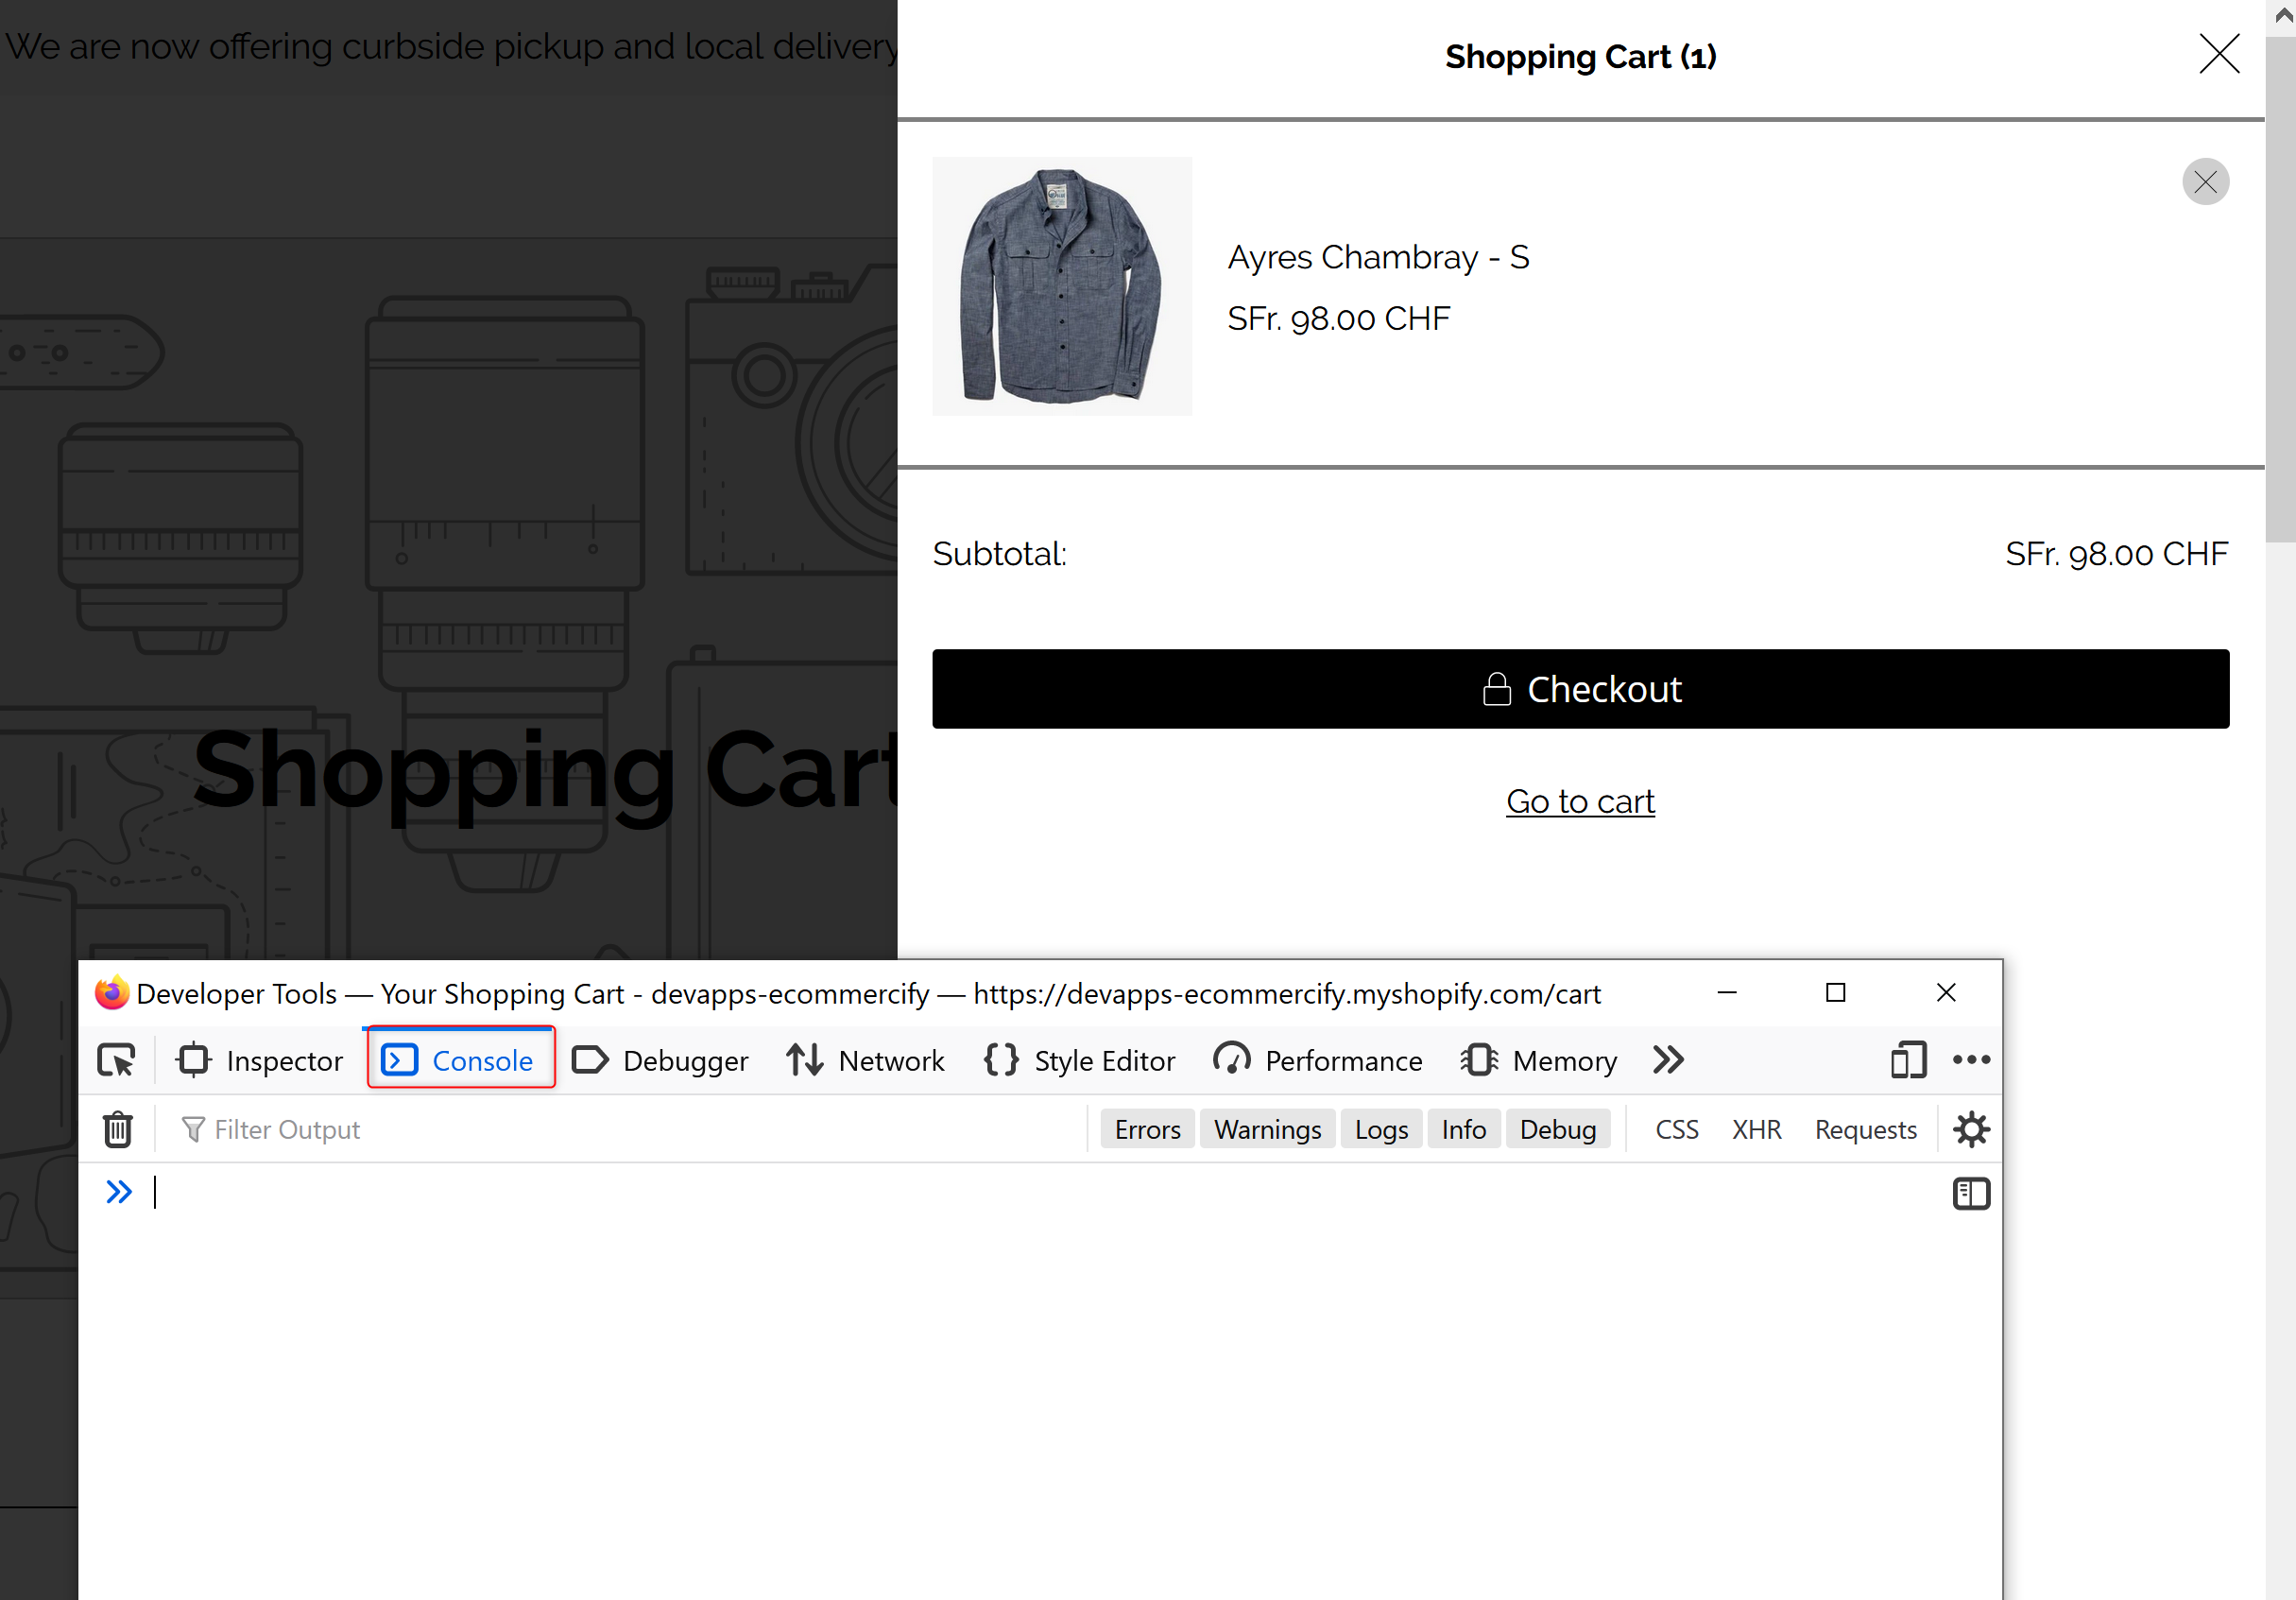
Now enter the command showc4ccart() and then hit enter. The widget should now be visible.
Step 5: Enable the Cart
The last step is to enable the cart for your customers. Back in the shopify admin go to apps > Click 4 Carbon
On the setting page click the Enable button and then save.
Congratulation! The cart widget is now installed and visible to your customers
Need Help?
You are not alone. If you are having problems, or the widget doesn't fit your stores theme we are here to help.
get in touch with us: helpdesk@ecommercify.ch
Standalone Cart Installation Instructions
Please Note: The following instructions are for the Debut theme
Step 1: Log into your store
If you aren't already logged into your store please do so now.
Once you are logged in we will access your theme files by first clicking on Themes in your shop admin and then Edit Code
Step 2: Find your cart
Before we add the widget to your theme files we first have to find the right place to do that.
Open a new browser tab and go to your store. Add a couple of items to your cart and then view the cart.
The best spot to add the widget is just after the list of items but before the summary information (the part that shows the cart subtotal)
Your cart will always be wrapped in <form> </form> tags and may optionally be wrapped with <table> </table> tags but this depends entirely on your theme. Lets now find the right element.
A great tool for that is the inspect feature in all modern browsers. Right-click near the end of the list of cart items and select inspect.
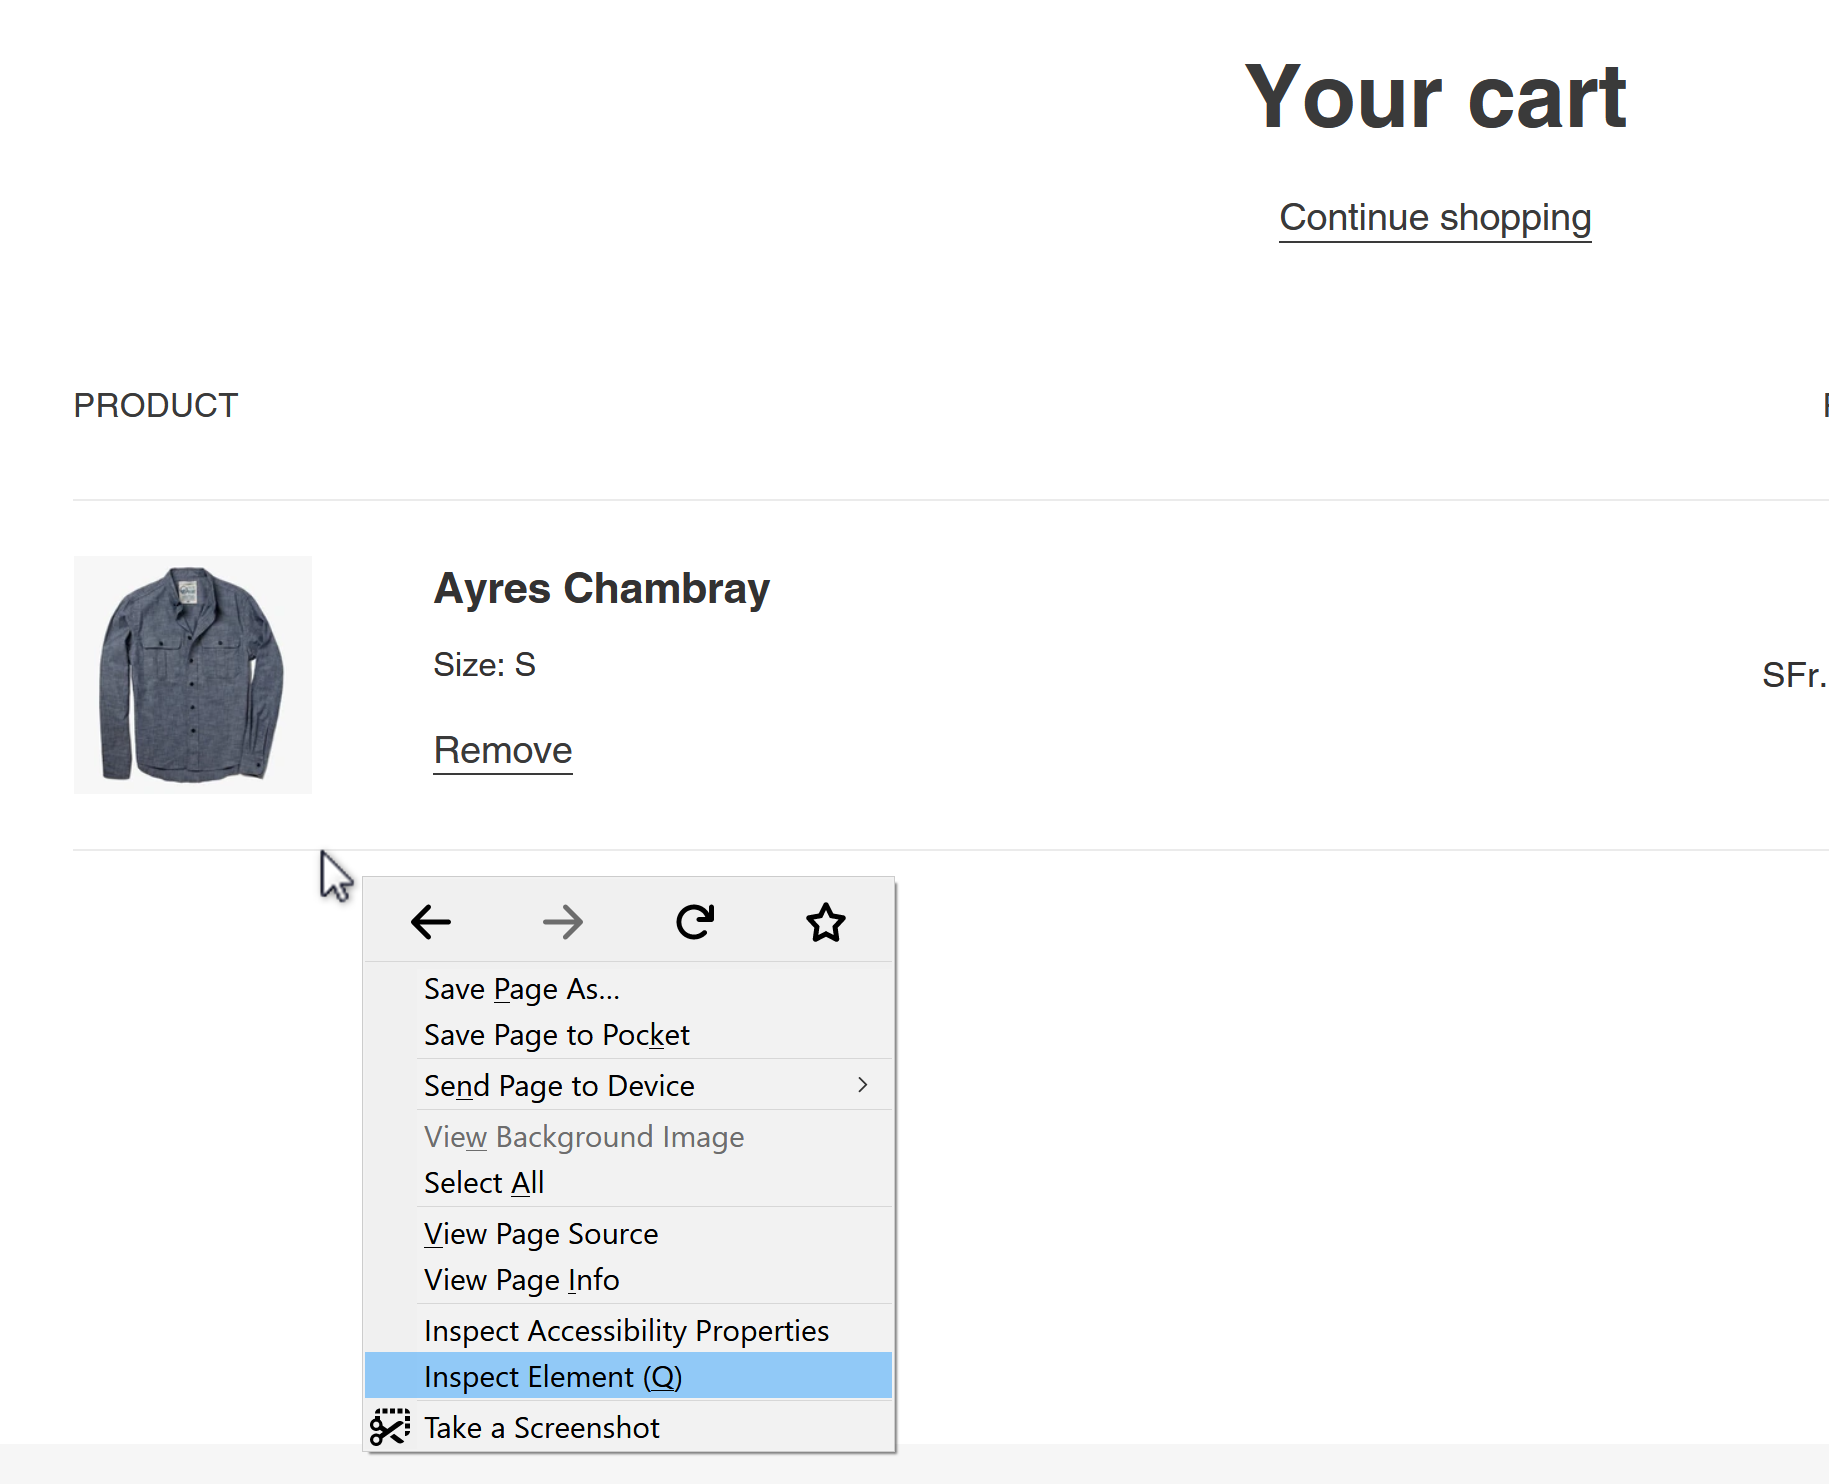
This will show the underlying HTML code, hover over the individual elements until the summary table is highlighted and you find the start element.
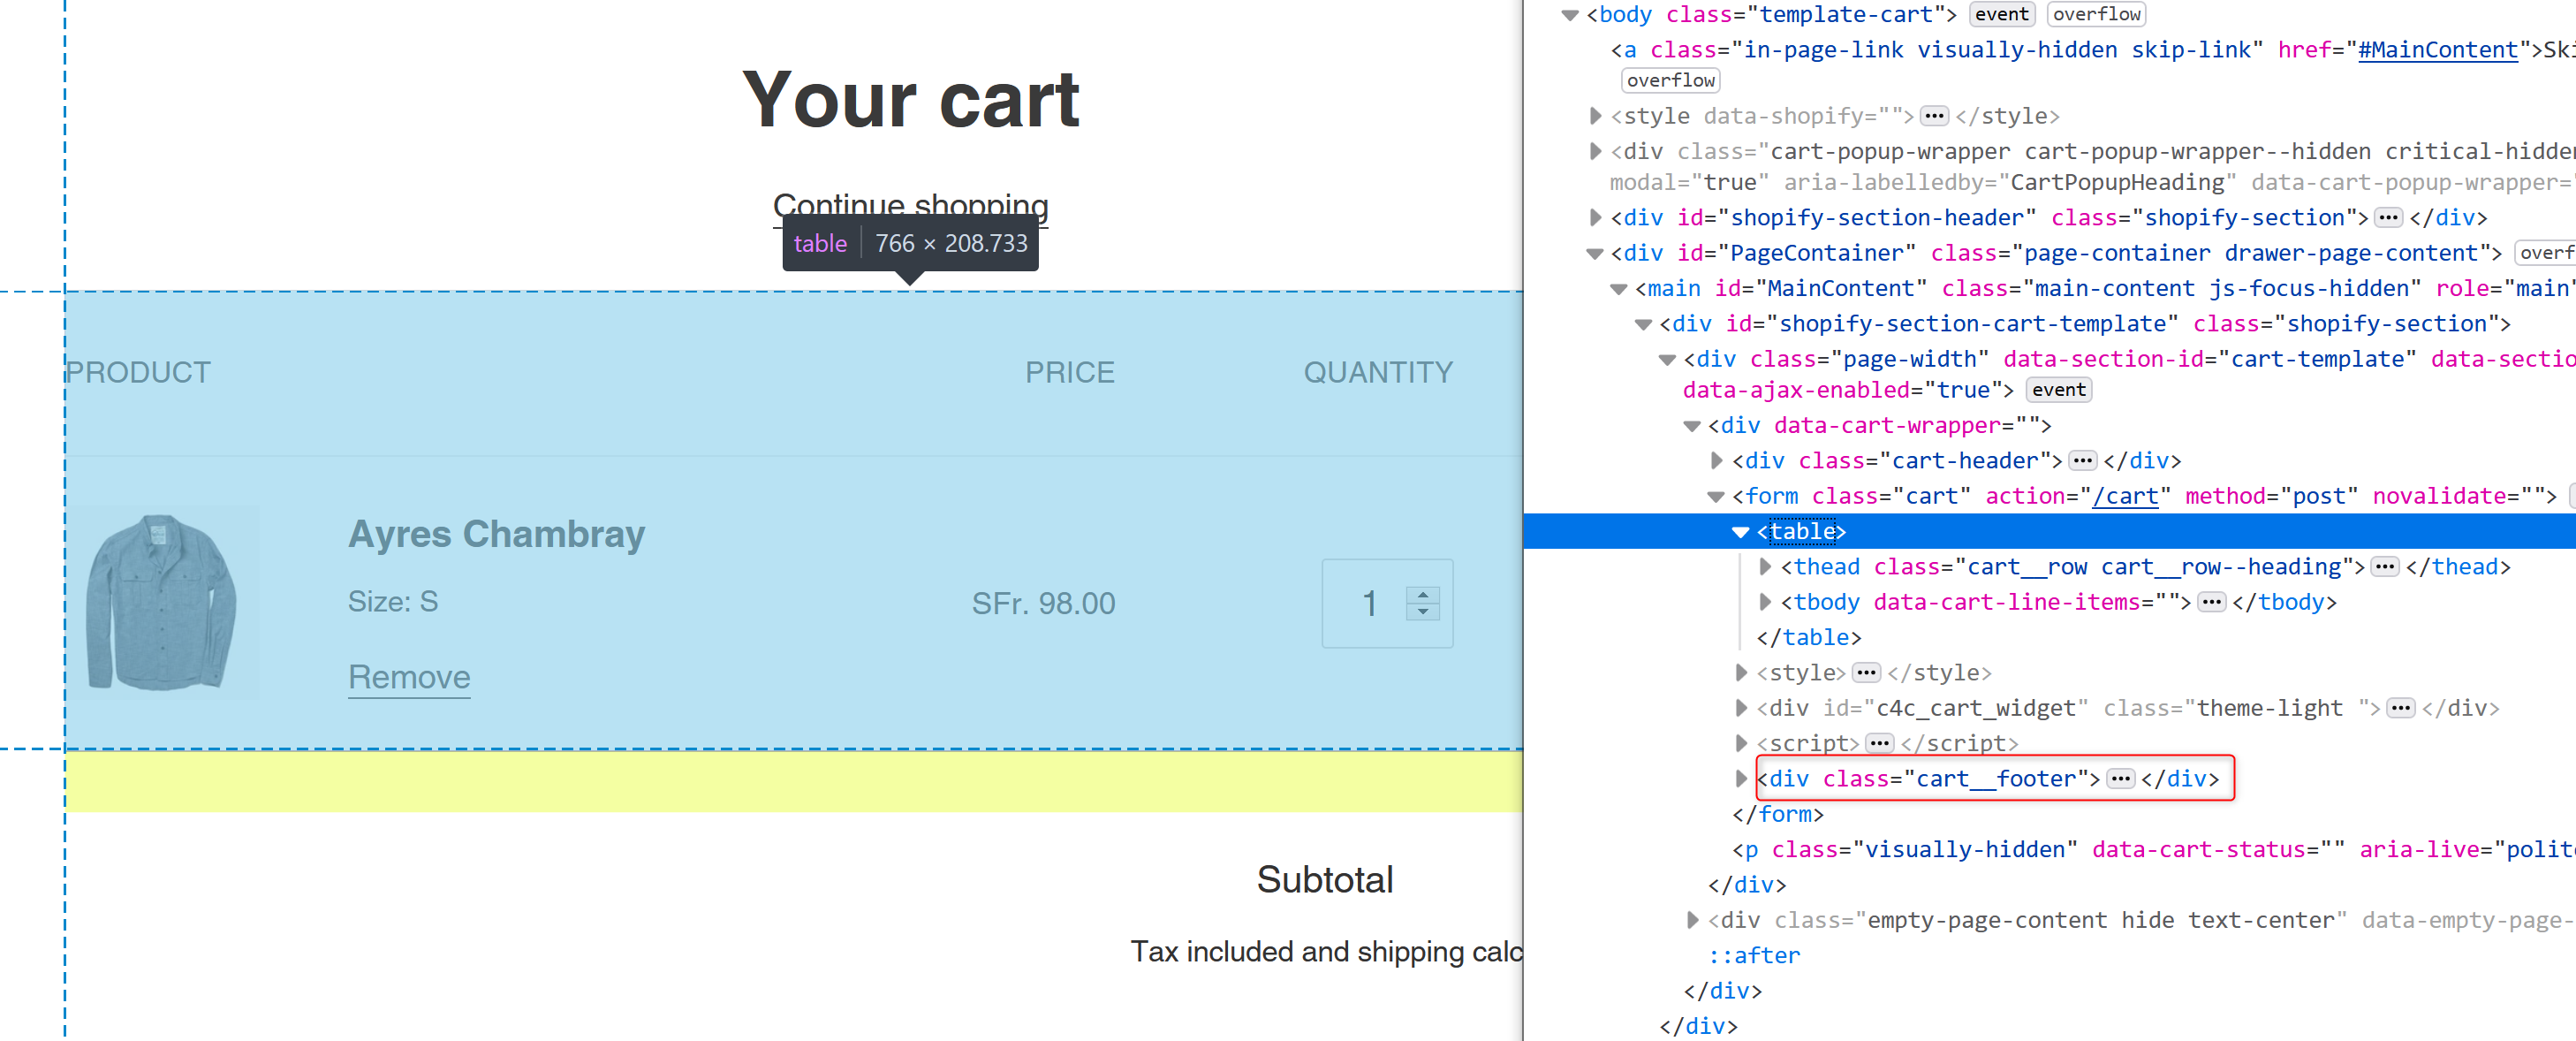
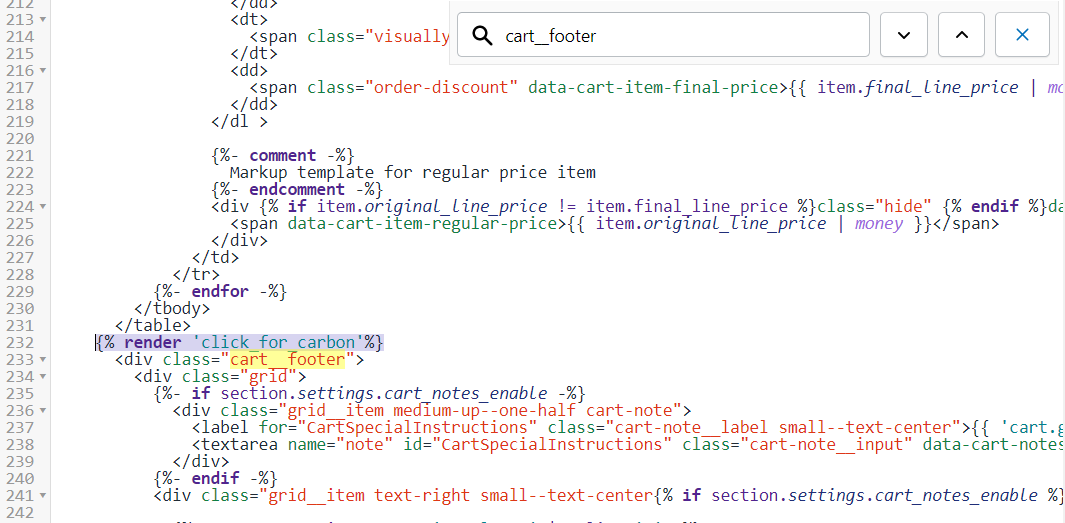
In the Debut theme this is the <div class="cart__footer"> element.
Now lets find that spot in your themes liquid files.
Step 3: Install the Widget Snippet
Back in the Shopify code editor locate your theme specific cart file.
If you aren't using the Debut Theme the HTML element you found in the step above might be in a number of different files. A couple common places to look are:
- templates/cart.liquid
- sections/cart-template.liquid (Debut theme)
- snippets/cart-form.liquid
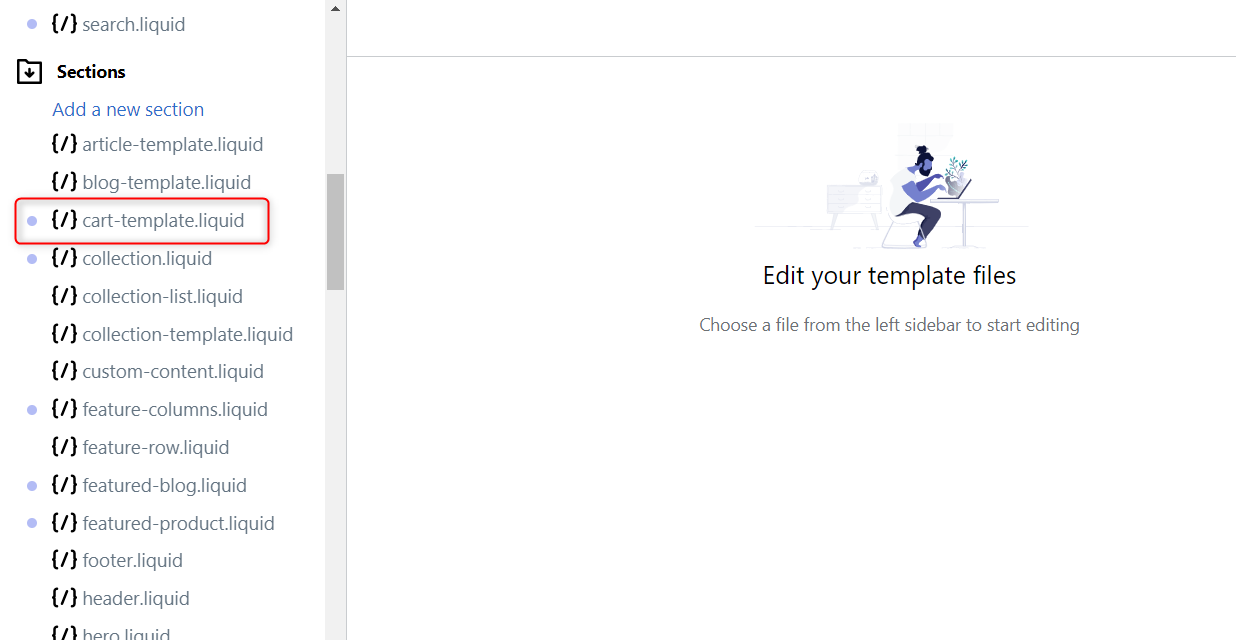
Since in this example we are using the Debut theme our cart code is located in the sections/cart-template.liquid file.
Edit the cart-template.liquid
Use the search feature in the code editor to search for the HTML element from step 2.
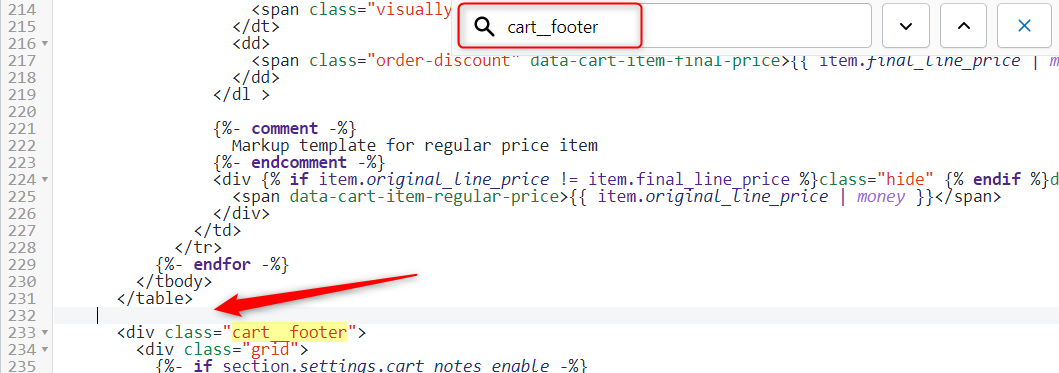
Now insert the code snippet {% render 'click_for_carbon' %} just above the element we searched for.
And thats it! Just save the file to finish the installation.
Step 4: Preview the Cart
To see the cart widget in action go back to the browser tab where you have your stores shopping cart open (from step 2 above) and add ?c4c-preview=true in the browser address bar and press the enter key.
Ensure that it's in the right place and lined up with the other elements in the cart. Don't worry, only you can see the widget at this point.
Step 5: Enable the Cart
The last step is to enable the cart for your customers. Back in the shopify admin go to apps > Click 4 Carbon
On the setting page click the Enable button and then save.
Congratulation! The cart widget is now installed and visible to your customers